Table of Contents
ToggleTable Of Contents:
- Key Takeaways
- Discover the Joy of a Gluten-Free Lava Cake Tonight
- Gather Ingredients for a Delicious Gluten-Free Treat
- Follow This Simple Recipe for Perfect Lava Cakes
- Master Tips for Baking Ideal Gluten-Free Lava Cakes
- Customize Your Lava Cake With Creative Additions
- Serve and Enjoy Your Gluten-Free Lava Cake Tonight
- Frequently Asked Questions
- Conclusion
Are you craving a chocolate cake but worried about gluten? Put your concerns to rest and embrace the decadence of a gluten-free lava cake that doesn’t compromise on taste. This blog post will guide you through gathering ingredients and a step-by-step recipe to bring this warm, gooey dessert to life in your oven. You’ll acquire baking tips to ensure your lava flows perfectly every time, and learn ways to personalize each ramekin with delightful flavors. By following along, you’ll resolve the dilemma of satisfying your sweet tooth without the presence of gluten, enjoying a luscious, molten-centered cake tonight.
Key Takeaways
- Gluten-free flour blends provide the structural integrity needed for lava cakes
- High-quality chocolate is crucial for achieving a rich, molten center in the dessert
- Careful preparation of baking molds ensures easy release and perfect presentation of cakes
- Beverage pairings like dark roast coffee or full-bodied wine can enhance the lava cake experience
- Sharing gluten-free lava cakes can create a sense of joy and inclusion at gatherings
Discover the Joy of a Gluten-Free Lava Cake Tonight

You’re in for a treat as we unveil the secrets to crafting an exquisite gluten-free lava cake. Experience the richness of molten chocolate cake without worry; our approach ensures that every spoonful is safe for those avoiding gluten. Dive into the art of mixing a flawless batter, substituting traditional flour with gluten-free alternatives, and mastering a cake that bursts with buttery, chocolatey goodness. Keep the anticipation high; what follows are practical tips to help you recreate this luscious dessert right in your kitchen tonight.
Uncover the Secrets Behind Gluten-Free Chocolate Desserts
Embracing a gluten-free lifestyle doesn’t mean you have to give up indulging in decadent desserts. With the right substitutions, even a chocolate chip muffin or a rich chocolate lava cake can be transformed into a gluten-free delicacy. Key to your dessert success is selecting the perfect blend of gluten-free flour that mimics the structure and texture of traditional flour: your cakes will rise beautifully and your muffins will have that ideal crumb.
Imagine topping off your evening with a piping hot lava cake, each bite a divine mix of warm chocolate and cool whipped cream. As you plan to prepare this delightful treat, attention to detail makes all the difference: using powdered sugar for that delicate sweetness and ensuring your chocolate chips are gluten-free goes a long way. Here’s a quick guide to the essentials for your gluten-free baking adventure:
| Ingredient | Role in Your Dessert |
|---|---|
| Gluten-Free Flour Blend | Base for structurally sound cakes and muffins |
| High-Quality Chocolate Chips | Essential for a gooey, rich lava center |
| Whipped Cream | A light, airy accompaniment to balance the richness |
| Powdered Sugar | For a smooth sweet finish on top |
Enjoy Rich Flavors Without the Gluten Complications
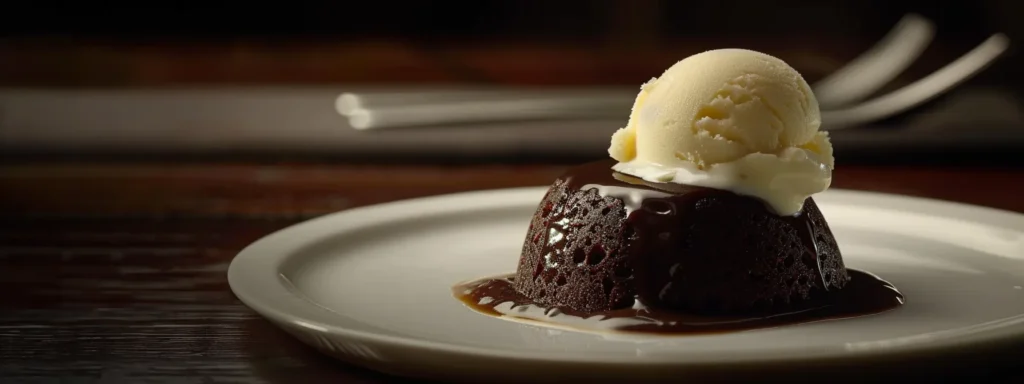
Indulging in a luxurious gluten-free lava cake does not demand you compromise on taste or texture. The richness you adore can be easily achieved by using a tablespoon of heart-healthy coconut oil in your mixture, granting a luscious, velvety consistency that often surpasses traditional recipes. When the cake is warm and ready, pairing it with a scoop of vanilla ice cream not only adds a contrasting coolness but also underscores the complexity of the chocolate, creating an unforgettable taste experience without gluten-related worries.
Your journey to making this delectable dessert shouldn’t be thwarted by the absence of gluten. By choosing ingredients wisely, like a full-fat cocoa powder, you ensure the depth of flavor you expect from a classic lava cake. Whip this mixture correctly, and you’ll serve a creation that boasts a molten center and a cakey exterior that’s sure to astound guests. Imagine the joy as they cut into the cake and find it as delightful as any traditional dessert they’ve savored.
Gather Ingredients for a Delicious Gluten-Free Treat

Embarking on your gluten-free baking journey begins with gathering the right ingredients. Start by choosing a gluten-free flour blend that will ensure a flawless cake structure. Then, seek out premium chocolate that promises an indulgent molten core. With a measuring teaspoon, whisk, and pure vanilla extract at the ready, you’re set to measure and mix the essential ingredients for your lava cake. In the next sections, you’ll learn how to bring these individual elements together with skillful cooking, leading to an exceptional dessert experience.
Select the Best Gluten-Free Flour Alternatives for Baking
When embarking on your gluten-free baking endeavor, the selection of flour is paramount. A reliable flour alternative blends rice, potato, or tapioca starches with xanthan gum to emulates the binding quality of gluten, ensuring your cakes maintain their structure. It’s essential to use a mix specifically designed for baking, as it will interact properly with the yolk and leavening agents, creating a tender crumb in your lava cake.
Your choice of flour not only affects the structural integrity of the treat but also its taste and mouthfeel. For a truly indulgent dessert, you might opt for an almond or coconut flour, which brings a subtle nuttiness and richness complementing the chocolate flavor. Always whisk dry ingredients thoroughly to prevent clumping, and remember to measure carefully to sustain the balance of liquid and powder ingredients, guaranteeing the dessert’s desired moistness without the presence of dairy.
Choose Premium Chocolate for an Indulgent Experience
For your gluten-free lava cake to truly shine, you must choose high-quality chocolate, the heart of any chocolate brownie or molten dessert. Opt for chocolate with a high cocoa content; this not only ensures the depth of flavor but also delivers a more satisfying melt, ideal for that gooey center. When you blend this with your chosen oil in a microwave oven, the mixture becomes the silken treasure that elevates your treat from good to memorable.
Using a mixer, you’ll whip the chocolate into a state of airy perfection, a crucial step for achieving the right consistency. Remember, the quality of chocolate you use plays a pivotal role in the final texture and taste of your dessert. Aim for a smooth, homogenous integration of the melted chocolate into your batter, ensuring that when you spoon the mixture into ramekins, you’re setting the stage for a gluten-free cake that surprises and delights with its rich indulgence.
Assemble All Essential Ingredients for Your Lava Cake
Before you begin, ensure you have coconut oil on hand; it’s a superb choice for your gluten-free lava cake, imparting moisture and a hint of tropical flavor without dairy. Gather ripe raspberries too – they’ll be the base for a vibrant sauce adding a burst of color and a tangy contrast to the richness of the cake. Preheat your convection oven for an even bake, one that envelops each cake in steady warmth, promising a perfectly molten center.
While your oven reaches the ideal temperature, organize your other components. You’re aiming for a symphony of ingredients that flawlessly meld together. From the cocoa blend that gives depth to the sugar adding just the right touch of sweetness, every item has its role. When you mix these with care, whisking each addition to smoothness, you’re not just baking; you’re crafting a moment of indulgent bliss that awaits at the edge of your spoon.
Follow This Simple Recipe for Perfect Lava Cakes

Embark on the delight of creating a gluten-free flourless chocolate cake as you preheat your oven and ready your baking molds for an unforgettable dessert experience. Engage in the artistry of mixing a batter imbued with rich vanilla extract and the cool undertones of vanilla ice, aiming for the velvety consistency of pudding. Once you’ve dusted and filled each mold, prepare for the magic of baking that transforms simple ingredients into a compelling culinary masterpiece.
Preheat Your Oven and Prepare Baking Molds Correctly
Begin your culinary adventure by preheating your oven, an essential step not even the most experienced chefs in the cookbook world would skip. A precise temperature is the key, so aim for 350°F (175°C), allowing your gluten-free lava cakes the steady heat they need to rise properly and form that irresistible molten center. As the heat works its magic, your dark chocolate and almond ingredients will meld together, their flavors intensifying to create a dessert that’s rich without being heavy on calories.
While the oven warms, focus on preparing your baking molds. Coat them lightly with coconut oil or a cooking spray to ensure a non-stick surface, then dust with cocoa powder to add an extra layer of chocolatey goodness. This preparation guarantees that once at room temperature, your lava cakes will release easily, presenting a flawless exterior. Getting these details right means capturing the bakery-style perfection of a moist cake with a flowing chocolate heart, an experience you can now replicate in your own kitchen.
Mix Your Ingredients to Achieve the Ideal Batter Consistency
For your gluten-free lava cake, begin by lining your baking molds with parchment paper, an effective method for smooth release post-baking. Combine your dry ingredients, including a pinch of xanthan gum, essential for replicating the binding properties of gluten. As you stir in the egg white, strive for a batter that’s thick yet pourable, akin to a luxurious caramel—an indication that your consistency is spot on for achieving that desirable molten center.
Add the zest of a lemon to bring a refreshing contrast to the intense chocolate flavor, ensuring your batter doesn’t become overwhelmingly sweet. When everything is thoroughly mixed, check for a silky texture that holds together well, a result of careful measurement and the addition of lemon zest, which should not be overdone lest it overshadow the delicate balance of flavors in your indulgent dessert.
Fill Your Molds and Prepare Them for Baking
To begin filling your molds, consider using brown sugar or coconut sugar, which can bestow an extra layer of flavor and a delightful caramel note to your gluten-free lava cake. Gently press the back of a spoon into the bottom of each mold to ensure an even distribution of sugar, taking care not to pack it down too firmly. This will create a sumptuous foundation for your dessert, offering the perfect contrast to the light, airy texture of the cake.
Once the molds have been sugared, it’s time to pour in your batter. If you’re using a muffin tin as a dish alternative, fill each compartment about halfway to give the cakes room to expand. For those opting for a richer flavor profile, a splash of coconut milk mixed into the batter just prior to filling can introduce a subtle tropical essence. Now, with your oven preheated and your batter ready, you are one step closer to enjoying a rich and delightful gluten-free treat tonight.
Master Tips for Baking Ideal Gluten-Free Lava Cakes

Now, to ensure your gluten-free lava cake captures the hearts of dessert lovers, focus on three pivotal baking techniques. Accurately adjust baking times for that perfect molten center, use effective tactics to prevent your cakes from sticking, and learn the art of checking doneness without risking an overbaked exterior. Whether using a tin or a bundt cake mold, mastering these steps means you’ll produce a dessert with a silky ganache-like interior every time. Arm yourself with a spatula and a keen eye; these tips will elevate your chocolate bar-inspired creation to new heights.
Adjust Baking Times to Achieve a Gooey, Molten Center
To achieve the signature gooey center in your gluten-free lava cake, paying close attention to your baking time is crucial. Use parchment to line your baking powder-prepped molds, as this will allow for easier release and consistent results. Start checking your cakes a minute or two before the timer goes off, using a measuring cup or spoon to gently tap the top. If it springs back just a bit, with a consistency closer to chocolate pudding than cake, it’s ready to come out of the oven.
Every oven is unique and so is your pantry of ingredients, making it important to know your tools and materials. Observe your cakes throughout the baking process and adjust the timing based on how they rise and set. Remember, even a minute can make the difference between a perfectly molten center and a firmer texture. Take notes on the timing that works best for your particular setup, providing a personalized guideline that ensures future endeavors are just as successful.
Use Techniques to Prevent Cakes From Sticking to Molds
Ensuring your gluten-free lava cakes release effortlessly from their molds is straightforward with proper preparation. Before filling, coat each mold liberally with a safe non-stick spray or brush a thin layer of oil, then dust it with gluten-free cocoa powder, shaking out the excess: these steps create a barrier between your cake and the mold, guaranteeing smooth removal after baking.
After baking, allow your lava cakes to rest for just a moment; this brief pause lets the cakes set slightly, making them less fragile when you invert the mold. Slide a thin butter knife around the edge if necessary, to gently ease the cake away without damaging its delicate top. Here’s a helpful visual guide to ensure your baking success:
| Baking Stage | Technique | Purpose |
|---|---|---|
| Before Baking | Coat with non-stick spray and dust with cocoa powder | To create a non-stick surface for easy cake release |
| After Baking | Rest and loosen edges, if needed | To set the cake slightly for stable removal |
Check Doneness Without Overbaking the Lava Cakes
Checking the doneness of your gluten-free lava cake can be somewhat tricky, as the goal is to maintain that delectable molten center without overcooking the perimeter. To strike the right balance, observe the cake’s surface; it should appear set around the edges while still soft in the center. A toothpick test can be misleading due to the liquid core, so rely on visual cues and a gentle touch.
For a foolproof bake, weigh the batter as you divide it into the molds: consistency here means uniform baking times for each serving. Insert a digital thermometer into the edge of the cake – not too deep – to check the temperature without reaching the molten heart: if it reads around 160°F (71°C), it’s time to remove your treat from the oven. Here’s a simplified guidance:
| Baking Element | Technique | Purpose |
|---|---|---|
| Visual Inspection | Look for set edges and a softer center | To keep the center molten and edges cooked |
| Temperature Check | Use a digital thermometer at the cake’s edge | To ensure the cake is baked through without overcooking |
Customize Your Lava Cake With Creative Additions

Enhance your gluten-free lava cake by adding your own twist with creative, delicious additions. Incorporate unexpected fillings such as gooey caramel or tangy berries for a burst of flavor. Opt for a dollop of creamy whipped topping made from dairy or a vegan alternative that caters to all preferences. Finally, elevate your dessert with unique toppings, ensuring that your lava cake stands out as a culinary marvel.
Incorporate Surprising Fillings Like Caramel or Berries
Your gluten-free lava cake can become an even more exciting treat when you insert a surprise inside. Envision breaking open the warm, soft cake to discover a heart of creamy caramel or a burst of tangy berry compote—a delightful contrast to the rich chocolate. This innovative twist not only adds a layer of flavor complexity but invites a personalized touch to your dessert, guaranteeing that each bite is as unique as your culinary style.
By adapting your traditional recipe to include these enticing fillings, you not only cater to various palates but also elevate the overall dining experience. Consider the charm of chocolate and raspberries or the classic pairing of chocolate and caramel. As the molten center oozes out, it’s more than just a dish; it’s a memorable encounter with indulgence, presented in a way that’s safe and wholly satisfying for those maintaining a gluten-free diet.
Garnish With Whipped Cream or Dairy-Free Alternatives
As you savor the rich cascade from your gluten-free lava cake, consider heightening its allure with a dollop of whipped cream or a scoop of its dairy-free counterpart. These embellishments not only add a creamy contrast to the dense chocolate but also open a realm of taste for those with dairy sensitivities or preferences. Opt for coconut cream or a soy-based whip to maintain the gluten-free promise while still indulging in a cloud-like topping.
Should you desire a touch of elegance or a hint of additional flavor, a swirl of dairy-free alternatives can do the trick. Choose from almond, oat, or cashew-based concoctions that are just as satisfyingly rich and easy to whip into soft peaks. Your dessert presentation remains impeccable with these alternatives and ensures a delectable finish that complements the intense chocolate of your lava cake:
| Whipped Topping | Base Ingredient | Why to Choose It |
|---|---|---|
| Traditional Whipped Cream | Dairy | A classic option that adds richness |
| Coconut Cream | Coconut | Non-dairy, imparting a subtle tropical flavor |
| Almond or Cashew Cream | Nuts | Delivers a nutty essence and is dairy-free |
| Oat Whip | Oats | A new alternative, offering a unique taste profile |
Add Tasty Toppings to Make Your Lava Cake Unique
Personalize your gluten-free lava cake with toppings to suit your taste and make it truly yours. A sprinkle of sea salt can enhance the deep chocolate flavor, while a dusting of powdered sugar presents an appealing contrast and a soft finish. These simple touches not only cater to your visual and palatable delight but also add sophistication to your homemade dessert.
Consider drizzling your lava cake with warm raspberry sauce or rich caramel for a visually striking and taste bud tantalizing finale. This addition not only provides a touch of elegance to your dish but also introduces a new layer of flavor, ensuring each forkful is a delightful exploration in taste and texture. Your efforts in the kitchen will be rewarded with praise and appreciation for a dessert that stands out as much for its flavor as for its presentation.
Serve and Enjoy Your Gluten-Free Lava Cake Tonight

Once your gluten-free lava cake is baked to perfection, the next step is truly delightful—serving it. You’re about to learn how to plate your rich dessert with elegance, ensuring each serving is as visually appealing as it is delicious. You’ll also discover the best beverages to pair with your lava cake, enhancing its flavors. Finally, get ready to spread the joy as you share this sumptuous creation with friends and family, making any occasion special.
Plate Your Dessert With Style for an Impressive Presentation
Initiate your dessert presentation by considering the backdrop: a pristine white plate can make the deep chocolate hues of your gluten-free lava cake stand out with elegance. A carefully placed mint leaf or a few fresh berries can add a splash of color, enhancing the visual allure before the first bite is even taken. As you plate, remember that simplicity often equates to sophistication, so let the natural beauty of your lava cake take center stage.
When you present your dessert, do so with flair; a gentle dusting of confectioners’ sugar can transform the presentation from homemade to restaurant-grade. Position the cake off-center and draw a curved line with sauce or create a pattern with edible flowers and herbs for a stunning finish. This attention to detail signals to your guests or family members the care and expertise invested in each serving:
| Element | Presentation Style | Visual Impact |
|---|---|---|
| Fresh Berries | Scattered artistically around the cake | Adds a pop of natural color and freshness |
| Confectioners’ Sugar | Dusted lightly on top | Provides an elegant, snow-kissed appearance |
| Sauce Drizzle | Artful zigzag or border | Creates a contrast and heightens flavor |
| Edible Flowers | Placed delicately on the plate | Enhances the refined aesthetic of the dish |
Pair Your Lava Cake With Complementary Beverages
To elevate the sensory experience of indulging in your gluten-free lava cake, pairing it with the right beverage can enhance both the cake’s rich flavors and your overall enjoyment. A cup of dark roast coffee offers a robust counterpart to the sweetness, cutting through the chocolate’s intensity with its bold notes. If you’re partial to wine, a glass of full-bodied red like a Merlot or zinfandel complements the dessert’s depth, ensuring that each bite and sip is a dance of perfectly matched indulgences.
Should you prefer a non-alcoholic option, consider a glass of cold milk or a dairy-free almond or oat milk—these choices bring a creamy texture and a touch of sweetness that harmonizes with the warm lava cake. On the other hand, a black tea with its tannic edge can balance the dessert’s richness while adding a layer of aromatic complexity to your culinary evening. Rest assured, these beverage pairings are selected to maximize your gluten-free chocolate experience, making the moment truly unforgettable.
Share Your Delicious Creation With Loved Ones
When you share your freshly baked gluten-free lava cake with loved ones, you’re offering more than just a dessert—you’re creating moments of connection and joy. Each cake, with its gooey, chocolate core and tender crust, becomes a means to show care and attention to dietary needs and preferences, ensuring everyone can partake in the delight. The pleasure they’ll find in the rich, chocolatey layers, safe for gluten-sensitive diners, will surely forge lasting memories.
Imagine the smiles and the contented sighs as your friends and family savor the complex flavors of your gluten-free creation, knowing full well it was crafted with their enjoyment in mind. Your skillful adaptation of a classic lava cake into a gluten-free wonder is a testament to your dedication to inclusive treats. As they experience the decadent indulgence, tailored to their health concerns, you reinforce bonds, turning a simple gathering into a special occasion.
| Gathering | Gluten-Free Lava Cake | Mood Created |
|---|---|---|
| Family Dinner | A warm, chocolatey end to the meal | Comfort and joy |
| Friends’ Get-Together | A shared indulgence for all | Inclusivity and delight |
| Special Celebration | An elegant, thoughtful dessert choice | Excitement and appreciation |
Frequently Asked Questions
Can I make lava cake without traditional flour?
Absolutely, you can make a scrumptious lava cake without using traditional wheat flour. Many home bakers use alternative flour options, such as almond flour or coconut flour, which not only cater to gluten-free requirements but also add unique flavors.
When crafting your flourless lava cake, it’s essential to ensure that your alternative flour is finely ground. This guarantees the desired gooey center and prevents any grainy texture, leading to a delightful dessert experience.
What ingredients do I need for a gluten-free lava cake?
To indulge in a delectable gluten-free lava cake, you need a few key ingredients. Start with a quality gluten-free flour blend, unsweetened cocoa powder, and baking powder as your base. Add granulated sugar, eggs, and pure vanilla extract for sweetness and depth.
Next, ensure you have dark chocolate and unsalted butter, which will melt together to create the sumptuous lava center. A pinch of salt balances the flavors. Don’t forget to gather your baking essentials: measuring cups, spoons, and ramekins to bake your cakes to perfection.
Is the recipe for gluten-free lava cake easy to follow?
Certainly, the recipe for gluten-free chocolate lava cake is straightforward. With clear directions and a minimal ingredient list, it’s a manageable bake for home chefs seeking a rich dessert that accommodates dietary restrictions.
Key steps include mixing the right gluten-free flour blend and carefully timing the baking to achieve the signature molten center. Follow the recipe precisely, and you’ll be rewarded with a delectable treat that doesn’t compromise on taste or texture.
What are some tips for baking a perfect lava cake?
For a superb lava cake, precise timing is key. Bake until the edges are firm but the center remains softened, ensuring that gooey, molten core. Preheat your oven correctly to the recipe’s suggested temperature to avoid over or under-baking.
Use quality ingredients, especially dark chocolate with a high cocoa content, for a rich flavor profile. Preparing your ramekins with butter and cocoa powder prevents sticking and contributes to a flawless release after baking, unveiling the perfect lava cake.
How can I add my own twist to a gluten-free lava cake?
Creating your own version of a gluten-free lava cake is all about experimentation. Try incorporating unique ingredients like espresso powder to intensify the chocolate flavor, or a pinch of chili for a spicy kick. These additions create a distinctive taste profile.
Consider filling your cake with unconventional centers, such as salted caramel or raspberry puree, for a delightful surprise. Personal touches like these will not only infuse your lava cake with originality but also cater to your taste preferences perfectly.
Conclusion
Embracing a gluten-free lifestyle no longer means sacrificing the pleasure of a decadent dessert, especially with the option of a rich gluten-free lava cake. This treat delivers not only a safe indulgence for those with gluten sensitivities but also introduces a delightful complexity of flavors. Through careful selection of gluten-free flours and high-quality chocolate, you ensure a dessert experience that equals, if not surpasses, its traditional counterpart. Your effort in preparing this luscious dessert promises an inclusive and joyous shared moment, making any occasion special for everyone involved.