Last Updated on October 9, 2024 by Timothy Byron Smith
Have you ever admired the intricate designs atop your latte but felt intimidated by the prospect of creating them yourself? This step-by-step guide will demystify the art of latte creation, covering essential tools, milk steaming techniques, and pouring methods. You’ll learn how to achieve the perfect microfoam consistency and create popular designs, whether using regular milk or oat alternatives. By the end of this guide, you’ll have the skills to impress friends and family with your barista-level latte art, enhancing both the taste and visual appeal of your coffee creations.
Understanding the Fundamentals of Latte Art

To master latte art, you need to understand its fundamentals. Learn the science behind espresso and milk, the importance of milk texture, and how to choose the right coffee beans. Discover the role of crema and avoid common beginner mistakes. With the right espresso machine and mug, you’ll be creating stunning designs, from simple hearts to intricate caramel and spice-topped masterpieces.
The Science Behind Espresso and Milk
Understanding the science behind espresso and milk is crucial for creating stunning latte art. The extraction process of espresso produces a rich, concentrated coffee with a layer of crema on top, which serves as the canvas for your designs. When you steam milk, you’re creating a microfoam by incorporating air into the liquid, resulting in a smooth, velvety texture that’s essential for pouring latte art. This process works well with dairy milk, but you can also achieve similar results using alternatives like oat milk. The key is to heat the milk to the right temperature and texture, allowing it to blend seamlessly with the espresso and create the perfect contrast for your latte art designs.
Importance of Milk Texture in Latte Art
Achieving the right milk texture is crucial for creating stunning latte art designs. When you steam milk for your drink, you’re aiming for a smooth, velvety microfoam that blends seamlessly with the espresso. Using a thermometer helps you heat the milk to the optimal temperature, usually between 150-160°F (65-71°C). This temperature range allows you to create intricate patterns like rosettes or hearts in your coffee. If you prefer cold drinks, you can also experiment with cold brew coffee recipes and adapt your latte art techniques for iced beverages.
Choosing the Right Coffee Beans for Latte Art
Selecting the right coffee beans is crucial for creating exceptional latte art. Choose freshly roasted, high-quality espresso beans with a balanced flavor profile to complement the milk in your cappuccino or milk coffee. Dark roasts often work well, providing a rich crema that contrasts beautifully with the steamed milk. Experiment with different origins and blends to find the perfect match for your latte art creations. Remember, the beans’ freshness affects the espresso‘s quality and the crema’s stability, which is essential for achieving intricate designs. You can even add seasonal flair to your drinks by incorporating flavors like pumpkin pie spice into your latte art repertoire.
The Role of Crema in Latte Art
Crema plays a crucial role in latte art, serving as the canvas for your designs. When you use a quality coffeemaker to brew espresso, it produces a rich, golden-brown layer of crema on top. This layer creates contrast with the milk foam, allowing you to craft intricate patterns. To enhance your latte art, experiment with different techniques like adding a sprinkle of chocolate or pumpkin spice to the crema before pouring the milk. Understanding how crema interacts with foam is essential when learning how to make coffee art, as it affects the visibility and durability of your designs.
Common Mistakes to Avoid as a Beginner
As a beginner, avoid common pitfalls that can hinder your latte art progress. Don’t rush the process of steaming milk or extracting espresso, as proper technique is crucial for achieving the right texture. Be mindful of your Nespresso machine’s settings and adjust them as needed for optimal results. When experimenting with alternatives like coconut milk, remember that its properties differ from dairy, affecting your latte art. Lastly, resist the urge to add sugar prematurely, as it can interfere with the foam‘s stability and the caffeine‘s impact on your design.
Essential Tools and Equipment for Perfect Latte Art
To create perfect latte art, you need the right tools. Choose an espresso machine that delivers consistent shots and a milk steaming pitcher for precise pouring. A thermometer ensures ideal milk temperature, while different frothers offer versatility. Don’t forget essential ingredients like quality syrup. Proper maintenance of your equipment, including your French press or AeroPress, is crucial for consistent results.
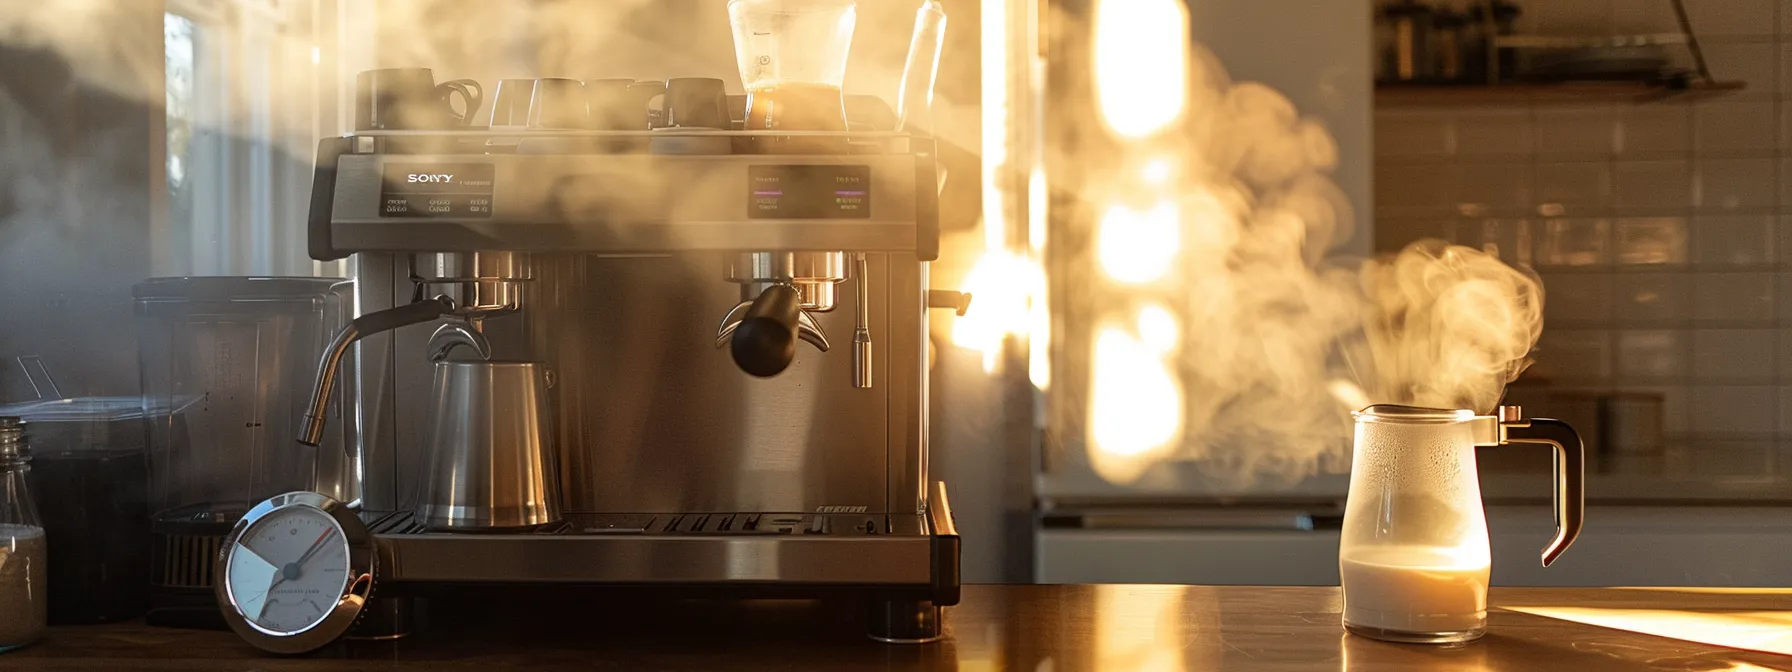
Selecting the Ideal Espresso Machine
When selecting an espresso machine for latte art, consider models that offer precise temperature control and consistent pressure. Look for machines with powerful steam wands to achieve the right milk texture for creating designs on coffee. Ensure the machine can maintain the proper water-to-coffee ratio for extracting espresso. Some models even accommodate alternative milk options like almond, which can expand your latte art repertoire. Remember, the right machine is crucial for mastering how to make latte art effectively.
Choosing the Best Milk Steaming Pitcher
When choosing a milk steaming pitcher for latte art, consider its size, shape, and spout design. A 12-ounce pitcher works well for most drinks, including pumpkin spice lattes and iced coffee variations. Look for a pitcher with a narrow spout to control milk flow precisely when creating intricate designs. Stainless steel pitchers are durable and maintain temperature well, whether you’re using dairy, soy milk, or other alternatives. Some pitchers even come with built-in thermometers, helping you achieve the perfect temperature for frothing milk and adding vanilla or other flavors to your creations.
Thermometers and Their Role in Steaming Milk
Thermometers play a crucial role in helping you achieve the perfect milk temperature for latte art. When learning how to make latte art, use a thermometer to heat your milk to 150-155°F (65-68°C) for optimal foam creation. This temperature range allows the milk‘s fat to emulsify properly, creating a smooth, velvety texture ideal for pouring designs. Whether you’re using regular milk or alternatives like almond milk for your latte, a thermometer ensures consistency in your steaming process, leading to better results in your latte art endeavors.
Understanding Different Types of Milk Frothers
When creating latte art, you’ll encounter various types of milk frothers, each with unique advantages. Manual frothers, like handheld whisks, offer control but require practice. Electric frothers provide consistency and are ideal for beginners. Steam wands on espresso machines give you the most versatility for creating microfoam. Automatic frothers simplify the process but may limit your control over texture. Choose a frother that suits your skill level and desired results to enhance your latte art experience.
Maintaining and Cleaning Your Equipment
To maintain the quality of your latte art, regularly clean and care for your equipment. After each use, purge your espresso machine‘s steam wand and wipe it clean. Backflush your machine weekly and descale it every few months. Clean your milk pitcher and thermometer with hot, soapy water after each session. For frothers, follow the manufacturer’s cleaning instructions. Proper maintenance ensures consistent performance and longevity of your tools, allowing you to create beautiful latte art consistently.
Step-by-Step Guide to Steaming Milk for Latte Art

Master the art of steaming milk for latte art with this step-by-step guide. You’ll learn how to prepare the perfect espresso shot, steam milk to the right consistency, achieve ideal microfoam, control temperature, and troubleshoot common issues. By following these techniques, you’ll create the foundation for stunning latte art designs.
Preparing the Espresso Shot
To prepare the perfect espresso shot for latte art, start by grinding fresh coffee beans to a fine consistency. Tamp the grounds evenly in your portafilter, aiming for about 18-20 grams for a double shot. Extract the espresso for 25-30 seconds, producing a rich, golden-brown crema that will serve as your canvas. Ensure your espresso machine is properly calibrated to achieve the ideal pressure and temperature for extraction, typically around 9 bars and 200°F (93°C).
Techniques for Steaming Milk to the Right Consistency
To steam milk for latte art, start by purging your steam wand and submerging it just below the milk‘s surface. Tilt the pitcher slightly and position the wand off-center to create a whirlpool effect. Introduce air by keeping the wand near the surface until the milk expands by about 20-30%. Then, submerge the wand deeper to create microfoam, continuing until the milk reaches 150-155°F (65-68°C). This technique produces the silky texture essential for pouring intricate latte art designs.
Achieving the Perfect Microfoam
To achieve perfect microfoam for your latte art, focus on creating tiny, uniform bubbles that give the milk a silky texture. Start by positioning the steam wand just below the milk‘s surface, creating a gentle whirlpool. As you steam, listen for a subtle hissing sound, indicating proper aeration. Once the milk expands by about 20-30%, submerge the wand deeper to incorporate the air evenly throughout the milk. This technique results in a glossy, paint-like consistency ideal for pouring intricate latte art designs.
Temperature Control Tips for Steaming Milk
To control temperature when steaming milk for latte art, use a thermometer to monitor the milk‘s heat. Aim for 150-155°F (65-68°C), which is ideal for creating microfoam and pouring designs. Stop steaming immediately when you reach this temperature to prevent overheating, which can scald the milk and ruin its texture. If you don’t have a thermometer, place your hand on the side of the pitcher; when it becomes too hot to touch comfortably, the milk is ready.
Troubleshooting Common Steaming Issues
When troubleshooting common steaming issues, start by checking your milk‘s temperature and freshness. If you’re experiencing large, uneven bubbles, you may be introducing too much air too quickly; try keeping the steam wand closer to the milk‘s surface for a shorter time. For milk that’s too thin or watery, you might not be incorporating enough air; extend the initial aeration phase slightly. If your milk separates after pouring, you’ve likely overheated it; use a thermometer to ensure you stop steaming at the right temperature.
Mastering Pouring Techniques for Latte Art Designs

To master latte art pouring techniques, you’ll need to focus on several key aspects. Learn to hold the pitcher and cup correctly, understand pouring speed and height, and master the wiggle technique for creating patterns. Combine movements for complex designs and practice with different cup sizes and shapes to refine your skills. These techniques will help you create stunning latte art designs consistently.
Holding the Pitcher and Cup Correctly
To hold the pitcher and cup correctly for latte art, grip the pitcher‘s handle with your dominant hand, keeping your index finger along the side for better control. Rest the cup on a flat surface, angling it slightly towards you. Position your free hand on the cup’s base to stabilize it during pouring. This grip allows you to maintain precise control over the milk flow and cup angle, essential for creating intricate latte art designs.
Understanding Pouring Speed and Height
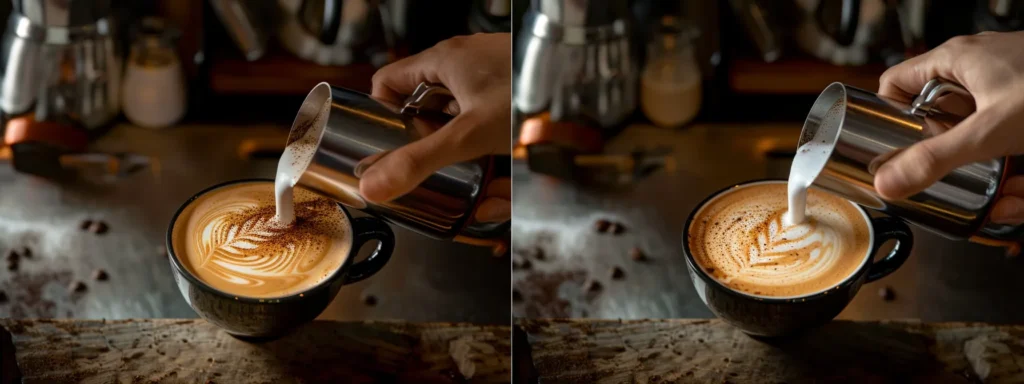
To create successful latte art, you must master the balance between pouring speed and height. Start pouring from a higher position, about 3-4 inches above the cup, to allow the milk to sink beneath the crema. As you fill the cup, gradually lower the pitcher and increase your pouring speed. This technique helps you create a smooth, even base for your design. When you’re ready to start your pattern, bring the pitcher closer to the cup’s surface, about 1-2 inches away, and slow down your pour. This change in speed and height allows you to control the flow of milk precisely, enabling you to craft intricate designs on the surface of your latte.
The Wiggle Technique for Creating Patterns
To master the wiggle technique for creating latte art patterns, start by pouring a steady stream of milk into the center of your espresso. As you pour, gently move the pitcher side to side in a rhythmic motion. This creates a series of waves or ripples on the surface of your latte. Control the speed and width of your wiggle to adjust the pattern’s appearance. As you near the end of your pour, slow down your movements and lift the pitcher slightly to finish your design with a clean, crisp line.
Combining Movements for Complex Designs
To create complex latte art designs, combine basic movements like the wiggle and straight pour. Start with a steady pour to create your base, then transition into a wiggle motion for the main body of your design. As you near completion, slow your pour and use precise movements to add fine details. Practice blending these techniques smoothly to achieve intricate patterns like rosettas or tulips. Remember to adjust your pouring speed and height throughout the process for optimal control and definition in your latte art.
Practicing With Different Cup Sizes and Shapes
To refine your latte art skills, practice with various cup sizes and shapes. Start with standard 8-ounce cups, then progress to larger sizes like 12 or 16 ounces. Each size presents unique challenges in terms of pouring speed and design scale. Experiment with different cup shapes, such as wide-mouthed bowls or narrow tulip cups, to adapt your techniques. This practice will improve your versatility and help you create stunning latte art across diverse vessel types.
Creating Popular Latte Art Designs Step by Step

Learn to create popular latte art designs step by step. You’ll master the simple heart, classic rosetta, and intricate tulip patterns. Discover tips for crafting the elegant swan design and explore the differences between free-pour and etching methods. These techniques will help you elevate your latte art skills and impress your customers or guests.
How to Pour a Simple Heart Design
To pour a simple heart design, start by filling your cup about two-thirds full with a steady stream of steamed milk. As you near the end of your pour, bring the pitcher closer to the surface and increase your flow rate. This creates a white dot in the center of your cup. To form the heart, pull the pitcher straight through the dot towards the opposite edge of the cup. Lift the pitcher slightly as you finish to create a clean point at the top of the heart.
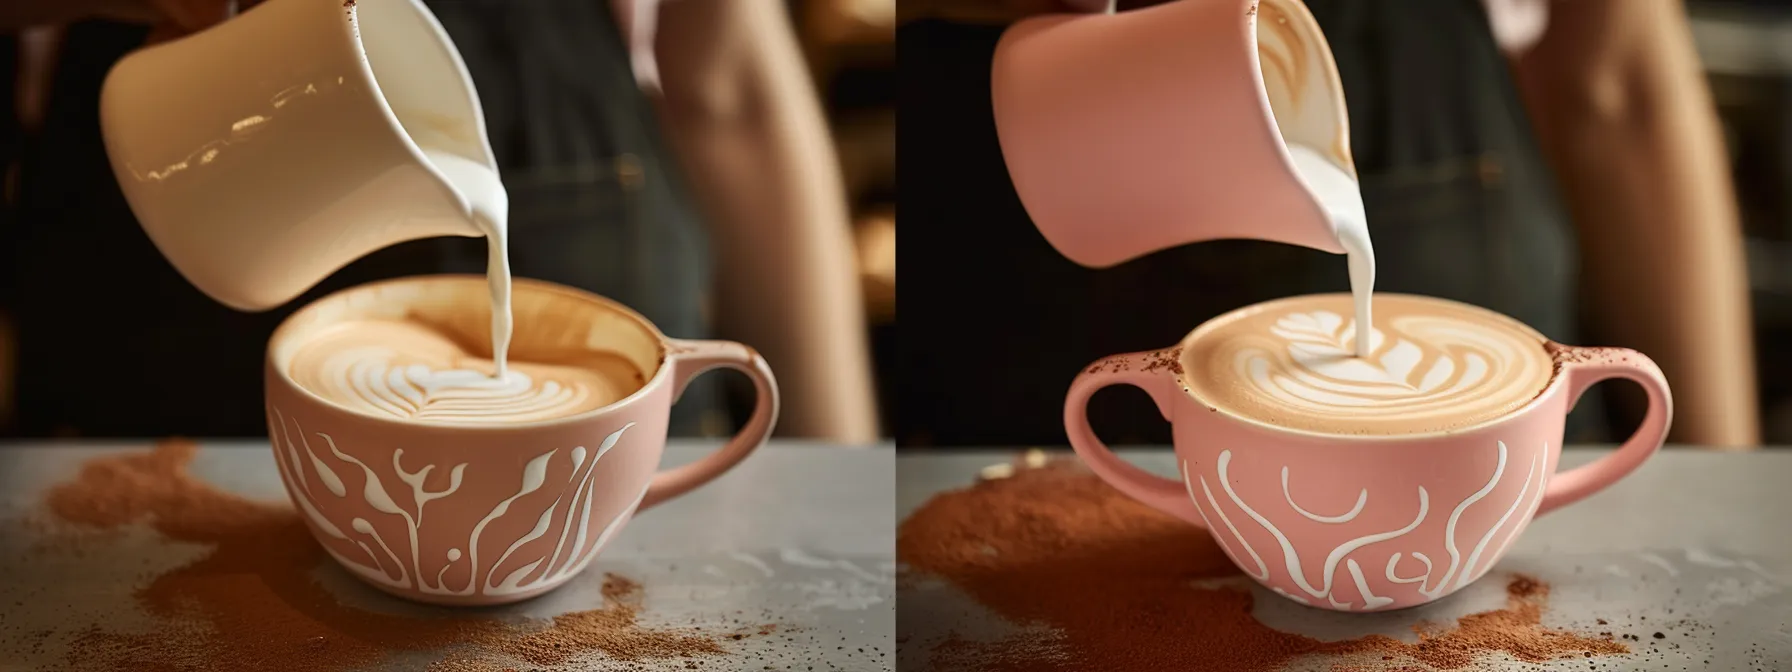
Crafting the Classic Rosetta Pattern
To craft the classic rosetta pattern, start by pouring steamed milk into the center of your espresso, creating a white circle. As you near the cup’s edge, begin moving the pitcher back and forth in a gentle wiggle motion while slowly pulling back. This creates a series of leaves or petals. To finish, draw a straight line through the pattern to form the rosetta’s stem. Practice controlling your pour speed and hand movements to achieve consistent, delicate lines in your design.
Step-by-Step Guide to the Tulip Design
To create a tulip design, start by pouring a small dot of milk in the center of your espresso. Then, pour a larger dot that pushes the first one forward. Repeat this process, creating progressively larger dots that push the previous ones forward, forming the tulip’s petals. Finish by drawing a thin line through the center of the design to create the stem. Control your pouring speed and height to achieve clean, distinct layers in your tulip pattern.
Tips for Making the Swan Latte Art
To create a swan latte art design, start with a heart shape as the base. Pour a curved line from the top of the heart to form the neck, then add a small dot for the head. Use a thin stream of milk to create the beak and eye details. Practice controlling your pour speed and hand steadiness to achieve smooth, graceful lines. Experiment with different milk textures to find the perfect consistency for intricate details in your swan design.
Exploring Free-Pour vs Etching Methods
When creating latte art, you can use two main methods: free-pour and etching. Free-pour techniques involve manipulating the flow of steamed milk as you pour it into the espresso, creating designs through the contrast between the crema and milk. Etching, on the other hand, uses tools like toothpicks or specialty pens to draw designs on top of the finished latte. While free-pour requires more skill and practice, it allows for faster creation of intricate designs. Etching offers more precision and the ability to create detailed images, but it takes longer and may affect the drink‘s temperature.
Enhancing Your Latte Art Skills
To enhance your latte art skills, incorporate daily practices to refine your technique. Learn from professional baristas, participate in competitions, and experiment with colors and textures. Sharing your creations on social media platforms can provide valuable feedback and inspiration. These strategies will help you improve your craft and create stunning latte art designs.
Daily Practices to Improve Your Technique
To improve your latte art technique, establish a daily practice routine. Start each day by steaming milk and pouring simple designs, gradually increasing complexity as you warm up. Focus on perfecting one specific element, such as your wiggle technique or pour control, each week. Record your progress through photos or videos, analyzing your movements to identify areas for improvement. Consistency in practice will help you develop muscle memory and refine your skills over time.
Learning From Professional Baristas
To enhance your latte art skills, learn from professional baristas by attending workshops, watching online tutorials, or even taking a barista course. Observe their techniques closely, paying attention to their hand movements, pouring angles, and milk texturing methods. Ask questions about their process and practice replicating their techniques at home. By learning from experienced professionals, you’ll gain valuable insights and tips that can significantly improve your latte art abilities.
Participating in Latte Art Competitions
Participating in latte art competitions can significantly enhance your skills and push you to new levels of creativity. Enter local or regional competitions to test your abilities against other baristas, gaining valuable feedback from judges and peers. These events often challenge you to create specific designs within tight time constraints, helping you improve your speed and precision. You’ll also have the opportunity to network with other professionals, learn new techniques, and stay updated on industry trends.
Experimenting With Colors and Textures
Experiment with colors and textures to elevate your latte art skills. Add natural food coloring to your steamed milk to create vibrant designs, or use cocoa powder and cinnamon for subtle hues. Try different milk alternatives like oat or almond milk to explore unique textures and pouring characteristics. You can also incorporate edible glitter or gold leaf for special occasions, adding a touch of luxury to your creations.
Sharing Your Creations on Social Media Platforms
Share your latte art creations on social media platforms to gain exposure and feedback from fellow enthusiasts. Use platforms like Instagram, Facebook, or TikTok to showcase your best designs, and include relevant hashtags to increase visibility. Engage with your followers by responding to comments and participating in latte art challenges. This practice not only helps you track your progress but also connects you with a community of baristas and coffee lovers who can offer valuable insights and inspiration for improving your skills.
Conclusion
Mastering latte art is a rewarding skill that combines technical expertise with artistic creativity. By understanding the fundamentals of espresso and milk science, selecting the right equipment, and practicing proper techniques, you can create visually stunning and delicious coffee beverages. Regular practice, learning from professionals, and participating in competitions can significantly enhance your skills and push your creativity to new heights. Ultimately, latte art not only elevates the coffee experience for customers but also allows baristas to showcase their passion and craftsmanship in every cup.